|
<< Click to Display Table of Contents >> Rotations |
  
|
|
<< Click to Display Table of Contents >> Rotations |
|
|
Just camera pans are not enough for you? You want more zest in your presentation? Add freely definable rotations to your images.
|
This feature is only available in AquaSoft Stages Ultimate. |
The following objects can be rotated:
|
|
|
|
|
It doesn't hurt to read the tutorial Movements first because the rotations are combined with movement paths. The chapters Rotating text and Letting texts fly give more information about rotating text.
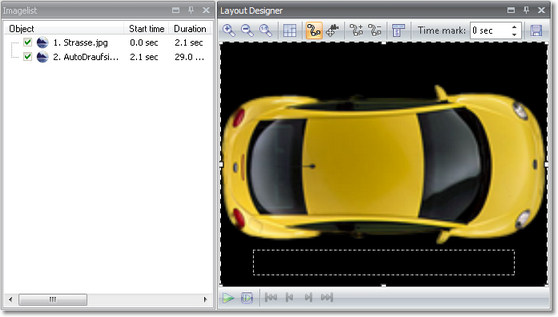
Create a new project ![]() and add an image.
and add an image.
|
Select the image in Image list or Timeline to display it in Layout Designer. The use the ![]() button in Layout Designer to zoom out a little.
button in Layout Designer to zoom out a little.
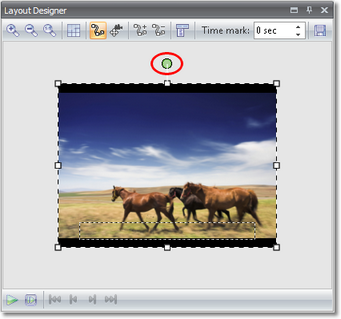
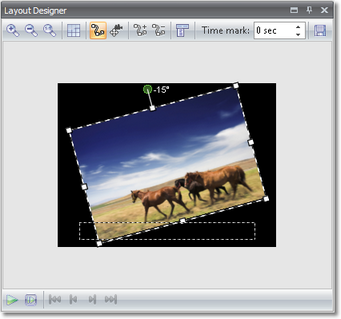
Now you can use the green handle to rotate the image. Click it, hold the mouse button down and define the rotation angle. Use the Position frame around the image to decrease its size.
|
The black area in Layout Designer is the visible area. Images need to be positioned in this area if you want them to be displayed. You need the outside area for special purposes like e.g. images or texts that "fly" in from the outside. |
To manually specify the rotation angle click on the image in Layout Designer and select Custom entry.
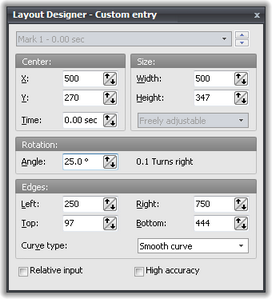
Now enter the Angle under Rotation.
Beautify your Collages by rotating the images in the Collage. Texts can be rotated this way, as well.
Of course this is not all you can accomplish with the rotation functionality. Would you like to trace your travel route with a car on a map? Then you can learn how to combine movement marks with rotations.
In our example we let the car follow a road. First we add the image of the road using the ![]() button. Instead you can add your image of the map.
button. Instead you can add your image of the map.
Now we need the car. Preferably it should be a PNG graphic with alpha channel.
|
Please consult the FAQ about how to create this type of graphic. |
Add the car.
Decrease the size of the image using the Position frame.
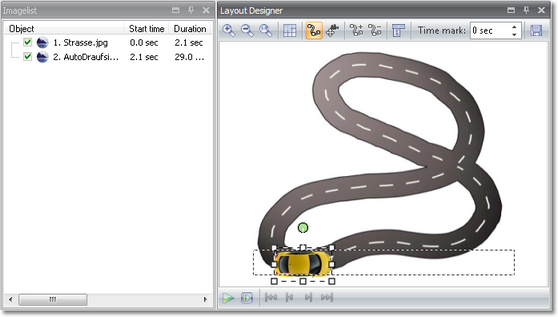
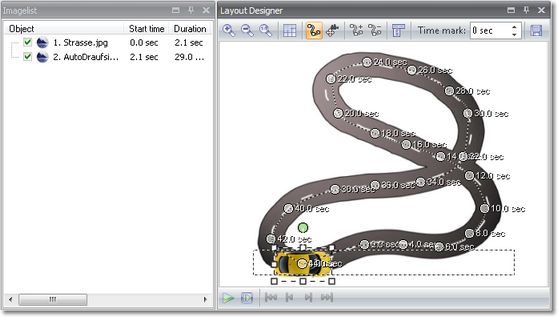
Now you can start the tour. Add a movement mark ![]() and rotate the car a little, following the direction of the road.
and rotate the car a little, following the direction of the road.
Add more movement marks and rotate the car accordingly.
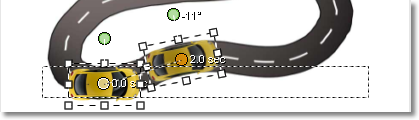
You can adjust the time marks for each movement mark individually. Click on a mark, it will then be highlighted. Change the time mark in the menu bar above the image.
![]()
Now replay your show via ![]() .
.
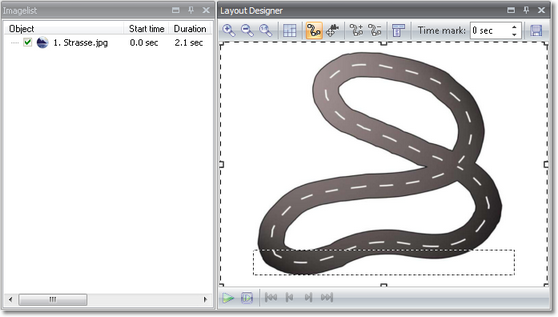
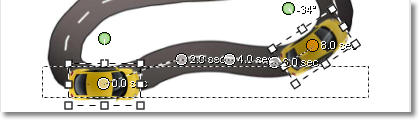
Eventually the complete movement path should look similar to the following graphic.
|
The rotation angle can be larger than 360 degrees. This way you can simulate effects like the skidding of a car out of a curve. |


