|
<< Click to Display Table of Contents >> Adding images |
  
|
|
<< Click to Display Table of Contents >> Adding images |
|
With AquaSoft Stages there are various ways to add photos. Some of them are very intuitive to use, while others may take some time to become familiar with. In this chapter you will learn more about the various methods for adding images.
|
In the Toolbar at the top of the program, there is a plus symbol within a circle, labeled “Add”. Clicking on the icon will open a view of your computer’s folders and storage locations. You can then select one or more photos to add to your project. Select the photo or multiple photos ( Ctrl + left mouse click ) that you would like to add and then confirm by clicking Open. |
 Image object |
In the Toolbox select the Objects tab. Under the headline Default you’ll find the Image object. Add photos by either double clicking the icon or by dragging and dropping it into the Timeline or Image list. It is also possible to drag the Image object and drop it on to the Layout designer. Once the Image object is placed (on the Timeline/Image list), a folder view will open from which you can select your desired photos. In order to select multiple images, proceed as described above. |
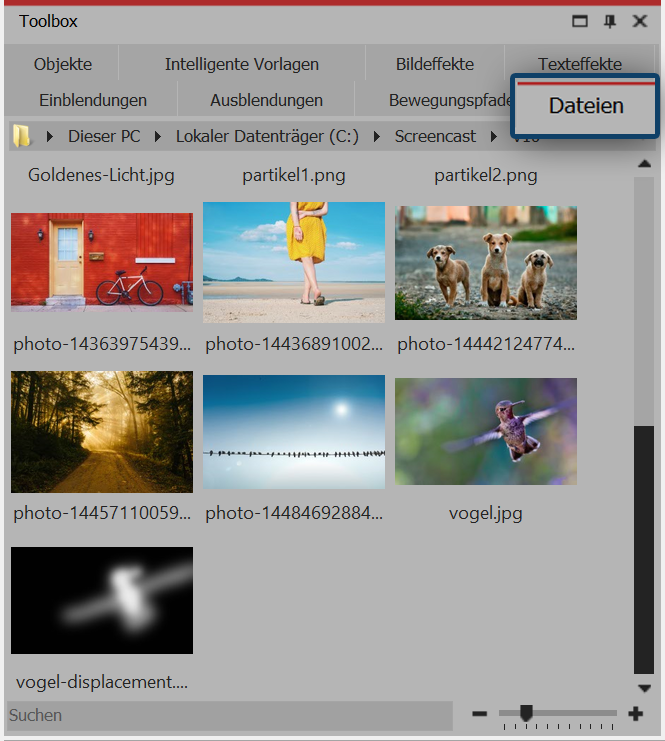 The images appear as thumbnails in the File explorer, below which are the file names. Using the search field located at the bottom left, you can search by file name and find your desired file faster. To place the files, just drag the thumbnails to the desired location on the Timeline. Be sure to pay attention to the little red line, as it will show you exactly where your media is being placed. |
“Drag & Drop” means clicking an icon, dragging it with the pressed mouse key to another place and letting it drop. When you’ve opened a folder outside of AquaSoft Stages that contains media, you can easily drag and drop the files directly into AquaSoft Stages. Minimize the program window by holding down the Windows key and the down arrow on your keyboard at the same time. Now you can comfortably drag and drop files from a folder or your desktop into the program.
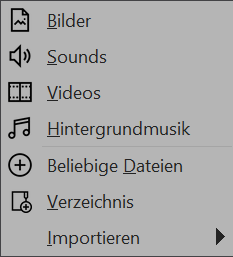 Select Images, and a file selection dialog pops up from which you can select one or multiple images. To select multiple images, hold down the CTRL key, while clicking on the files. Utilizing another option under the Add menu, Directory, you can easily add entire folders. A dialog box pops up in which you can define exactly which data (type) is added and whether sub folders should be added as well. |
In the drop down menu Wizards you will find the Import Wizard. With this Wizard you can add images directly from your camera or scanner into your project. You can find a detailed description of the process in the chapter "Import Wizard".
Have a PowerPoint presentation and want to transfer individual slides into your project? Then follow the instructions in the chapter "PowerPoint Wizard".
|
For more info on adding images check out our video "AquaSoft SlideShow 9: Adding and arranging videos". |
