|
<< Click to Display Table of Contents >> Adding images |
  
|
|
<< Click to Display Table of Contents >> Adding images |
|
In AquaSoft SlideShow you can add your images in various ways. Some of them are very intuitive to use, while others are more advanced. Learn in this chapter the methods for insert images and find the solution that suits your needs.
|
In the Toolbar at the top of the user interface is a large Plus-symbol. Clicking the symbol will open a view of your folders and locations. Select the place where there are one or more images that you want to insert. Select the image or images (Strg-key and click on the image to select multiple images) and confirm with OK. |
|
Select the Objects Tab in the Toolbox. In the section Default you will find the Image object. Add it either by double-clicking or drag it with the mouse in the Timeline or Image list to the point where you want to insert an image. It is also possible to drag the Image object on the Layout designer. After the Image object is placed, the Add files dialog opens again. To select one or more images you can do the same as it was already described in the top section.
|
|
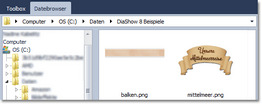
Display the File browser. It is located on the left in the Default view, where the Toolbox is displayed initially. Open the folder where your images are located. Sometimes you have to open the folder structure further to see subfolders. Just click on the little plus icon, which is located in front of the folders. The images are displayed as small thumbnails in the File browser. You can now drag these preview images to the Layout Designer, the Timeline or the Image list. |
If you open a folder where your images are located outside of AquaSoft SlideShow you can drag the images into the program window of AquaSoft SlideShow.
Minimize the program window by pressing the Windows key and the down arrow on your keyboard (or click the symbol on the top right of the window to minimize). Now you can easily drag files from a folder or from your desktop to the program.
|
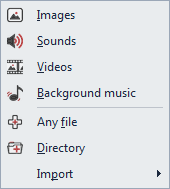
In the top menu bar, there is the Add item, in which you get several options for inserting various types of data. If you select the Images option the Add files dialog opens and you can select one or more images. With the Directory option you can insert an entire folder. If you select this option, a dialog box appears in which you can define exactly which data will be inserted, and whether to include subfolders. |
In the menu Wizards there is the Import Wizard. With this, you can insert images directly from a camera or scanner into the project. See chapter "Import Wizard" for a detailed description.
If you have a PowerPoint presentation and want to transfer the slides into your project, then follow the instructions in chapter "PowerPoint Wizard".