|
<< Click to Display Table of Contents >> Archiving a menu |
  
|
|
<< Click to Display Table of Contents >> Archiving a menu |
|
If you have created a menu, you can archive it. You can create a ZIP file of all projects and images you have used with the help of the export wizard.
1.Load or create a new menu.
Click on the left side of the menu assistant window in the project tree on the item "Projects".
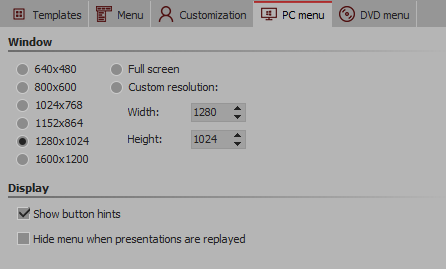
2.Click on the “PC menu” tab Here you can enter settings for the export. Select a predefined resolution or enter your own resolution. If you want to play the menu back later, the pre-set resolution will be used. Activate “Show button hints” if you later want notes related to a button's function to be displayed when you move a mouse over it.
3.Click the button ![]() .
.
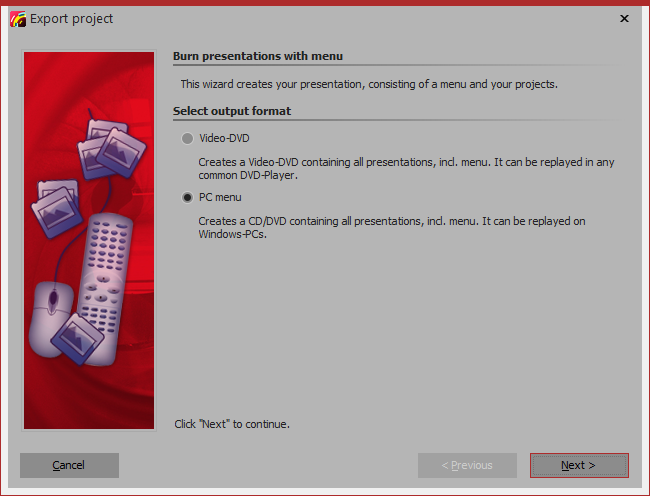
4.Select the output format "PC menu” and click "next".
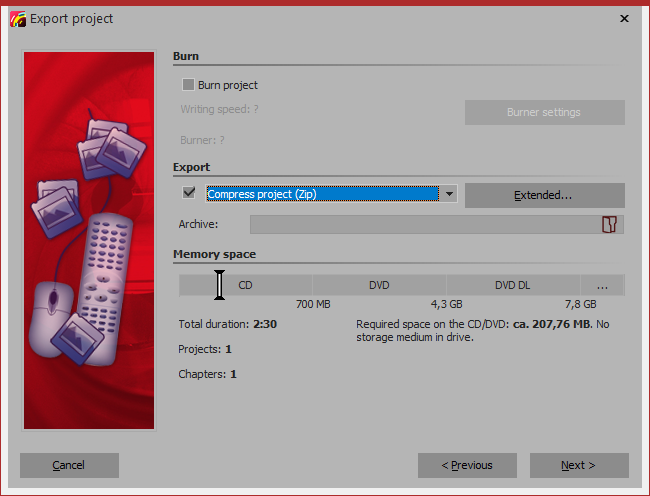
5.Uncheck the box “burn menu and select the checkbox to the left of the drop-down menu.
From the drop-down menu, select the item “Compress project (Zip)”.
Click the "Extended" button and activate the checkbox “Copy player” if you wish the player for the menu to also be copied into the ZIP file. Activate the checkbox “Copy fonts” if you want the fonts that you use in your templates to also be copied into the ZIP file.
Enter a destination file and click “Next”. The Menu Wizard will warn you if you have specified an existing ZIP file.
6.The Menu Wizard is now ready for the export. Click on the “Export menu" button.
7. Upon completion of the export, click "OK".