Ken Burns Effect


Ken Burns Effect |
|
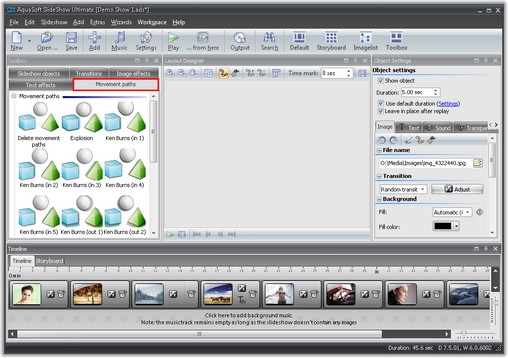
You will find an example of the Ken Burns effect in the sample slideshows supplied with the software. In AquaSoft ® SlideShow you can quite simply apply this effect to your images. Insert a few images into an empty slideshow. In the Toolbox you will find the Ken Burns effect under Movement paths.
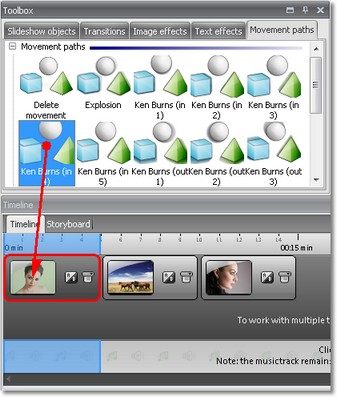
To apply it to an image, simply drag the effect out of the Toolbox onto the corresponding image.
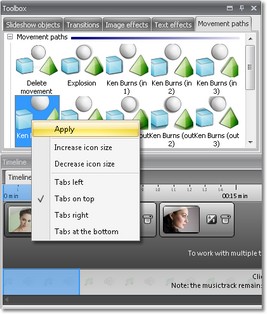
If you would like to assign a Ken Burns effect to several or all images select these images. All images = Ctrl + A Certain images = Ctrl + right click on the image Select the Ken Burns effect with the left mouse key, then click right and select Apply. The Ken Burns effect will be assigned to all selected images.
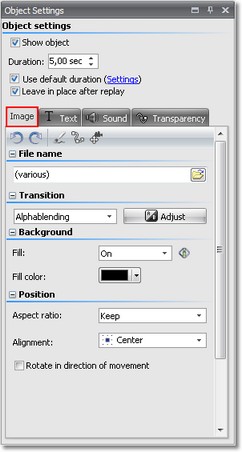
Now select Alphablending as Transition in the Image Object settings. The Fill function has to be enabled as well.
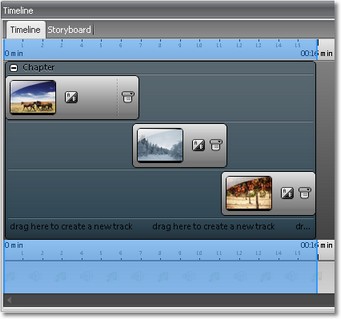
Then play back the show with You notice that the transitions could be a little smoother. This can be accomplished by using a Chapter. Add a Chapter to the show. Move the Images into the Chapter and arrange the images in a stair shape. The start of an image needs to be moved slightly underneath the end of the previous one.
Then play back the show with The Ken Burns effect is implemented by means of a Camera pan. You can also change this individually. For that purpose, you have to change in the Layout Designer to the Camera pan mode. To do that, click
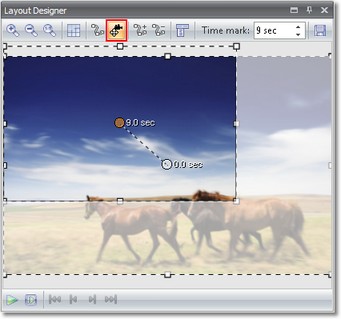
The movement path is now shown in the Layout Designer. How quickly or slowly a movement progresses is determined by means of the time set to the 2nd movement mark. The greater the time, the more slowly the movement is carried out. In order to change the time and thus the sequence, click the 2nd movement mark in the Layout Designer. The movement mark with 0.0 sec is the first one and therefore the starting position. After you selected the 2nd mark you can change the time set via the image under Time mark. A selected movement mark is shown in the Layout Designer in orange. When using a Ken Burns Effect only a part of the image section is used at the first movement mark. You will notice the smaller Position frame. Only during the Camera pan will the full image section become visible. Therefore, the Position frame is larger at the second movement mark. You will find more about movement path in the chapters Movements and Zoom.
|
| Copyright © AquaSoft GmbH 1999-2015 www.aquasoft.net |