|
<< Click to Display Table of Contents >> Picture-in-Picture |
  
|
|
<< Click to Display Table of Contents >> Picture-in-Picture |
  
|
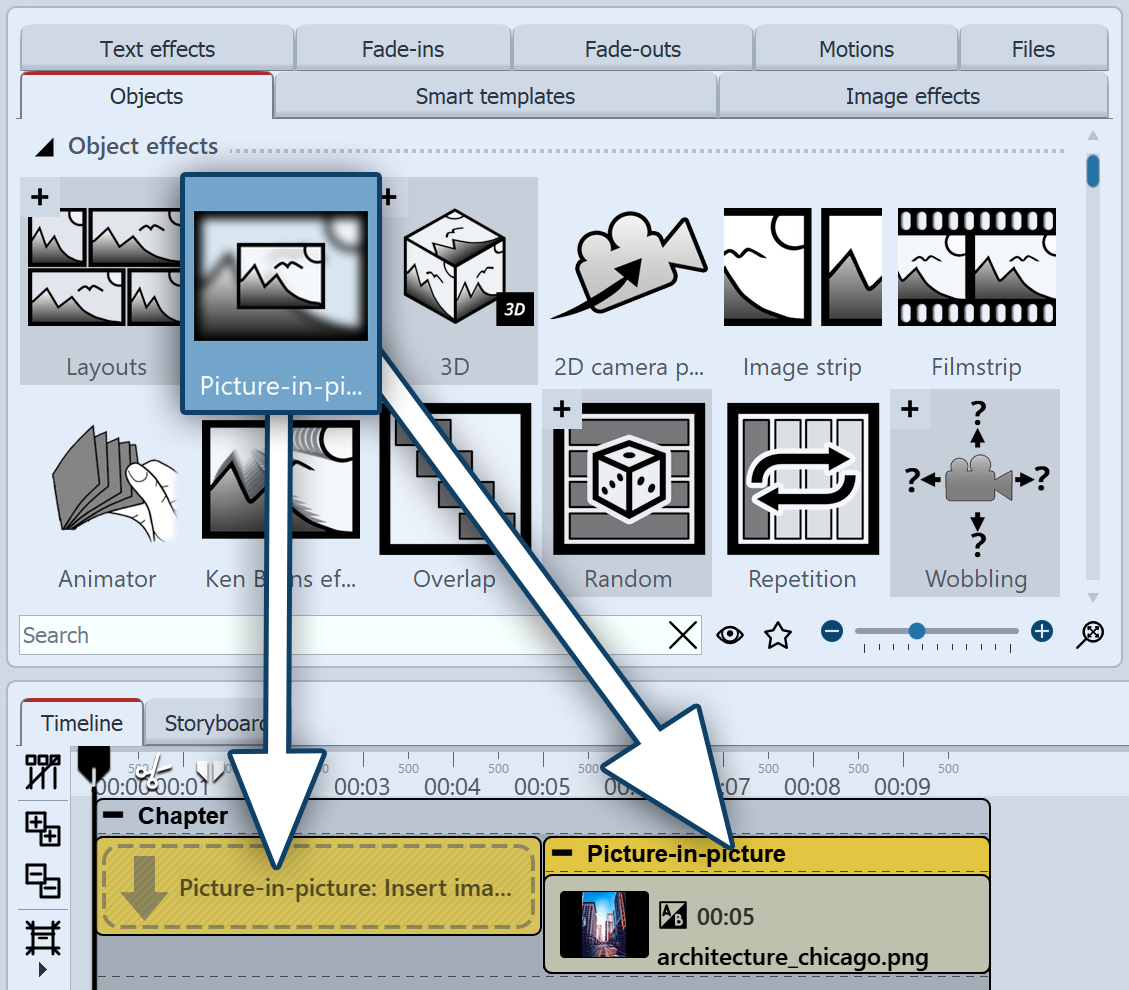
 Picture-in-Picture With the Picture-in-Picture effect, you arrange a photo or video against a background generated from the photo or video. This lets you achieve an interesting foreground-background collage. The effect is great for presenting portrait photos or portrait videos in an appealing way. You can find the effect inthe Toolbox under the Objects tab in the Object Effects section. |
1 Insert Picture-in-Picture effect
 Insert Picture-in-Picture effect Drag the Picture-in-Picture effect from the Toolbox to the Timeline. You will now see a colored box in the Timeline. Insert your image or video here. To do this, get the image or video into the Timeline using the Toolbox File browser tab, for example, or drag an Image object or Video object into the Picture-in-Picture effect to insert an image or video. |
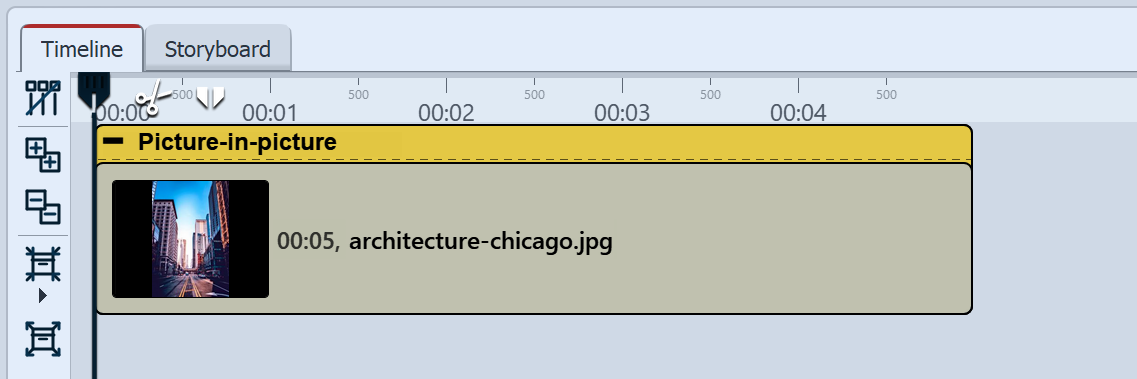
 Filled Picture-in-Picture effect in the Timeline Only one image or video can be inserted into the Picture-in-Picture effect at a time. |
|
In the Toolbox section Smart Templates, you will also find a smart template Picture-in-Picture, which allows you to insert several images with one setting. |
2 Settings for the effect
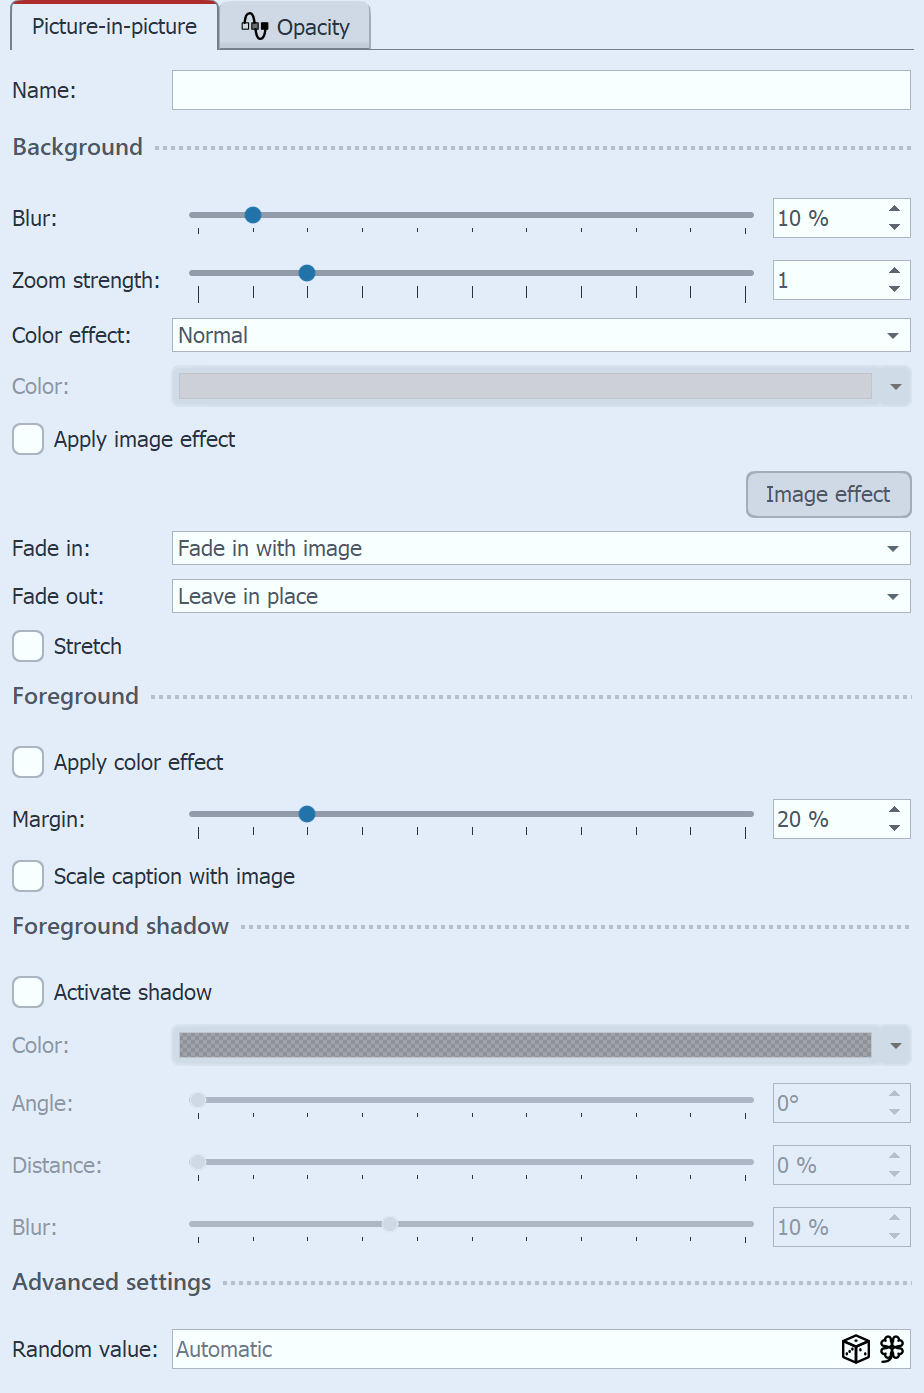
 Settings for Picture-in-Picture effect |
After you have inserted the image or video , click the colored frame of the Picture-in-Picture effect in the Timeline.Background settings: In the Properties section you can now set the blur strength for the background image. With the setting 0, the background is shown without blur. Zoom strength: Determine whether the background should be played with an animated zoom effect during the display duration and how much it is zoomed in.For the background not to be zoomed, select "0" for zoom strength. Under Color effect you can choose between the options Normal (background without color effect), Colorize (background is colored with selected color), Black & White and Sepia for the background design. The color selector only becomes active when you activate Colorize. Apply image effect: If the foreground image has an image effect (e.g. frame or similar), this image effect can also be applied to the background. VIDEO VISION STAGES Use the button of the same name to open the Image editor. Use Fade in and Fade out to specify how the background is faded in and out. Stretch: If the box is checked, the background will be stretched instead of cropped. Foreground settings: Apply color effect: The color effect applied to the background can also be applied to the foreground. The border distance determines how much smaller the foreground is shown on the background. Select 0% so that a portrait format, for example, is fitted to full height. If Scale caption with image is activated, an image caption will be scaled down proportionally to the resized image. Foreground shadow: Add a shadow to the foreground via Activate shadow. Specify the color of the shadow, the angle, the distance and the blur for the shadow. The zoom movement for the background can be fixed with a defined random value. The same zoom direction is then always visible each time the video is played. Click on the Cube to obtain a defined value. Then check the zoom movement during playback. Click on the Cube again to obtain a new value. Click on the Cloverleaf to return to random mode. 3 Save your own variants of the effectIn the Mini-templates section, you will find different preset variants of the Picture-in-picture effect. On the thumbnails in the gallery you can see how the respective template works. Click on the desired template to apply it to your image or video. You can be in AquaSoft Video Vision and Stages to save the Picture-in-picture effect with your preferred settings as your own Mini-template or save it as a custom object and use it again and again. Proceed as follows to save the Picture-in-picture effect as a custom object: - Simply insert the Picture-in-picture effect without an image into Timeline. You can then use the self-saved effect variant in the same way as the original effect. |
 Effect with Colorize / Blur 10% / Zoom strength 2 / Margin 0% |
 Effect with Colorize / Blur 0% / Zoom strength 1 / Margin 10% |