|
<< Click to Display Table of Contents >> First steps (quick guide) |
  
|
|
<< Click to Display Table of Contents >> First steps (quick guide) |
  
|
Three steps to a first presentation: Start the program and select an empty 16:9 project in the Welcome dialog.
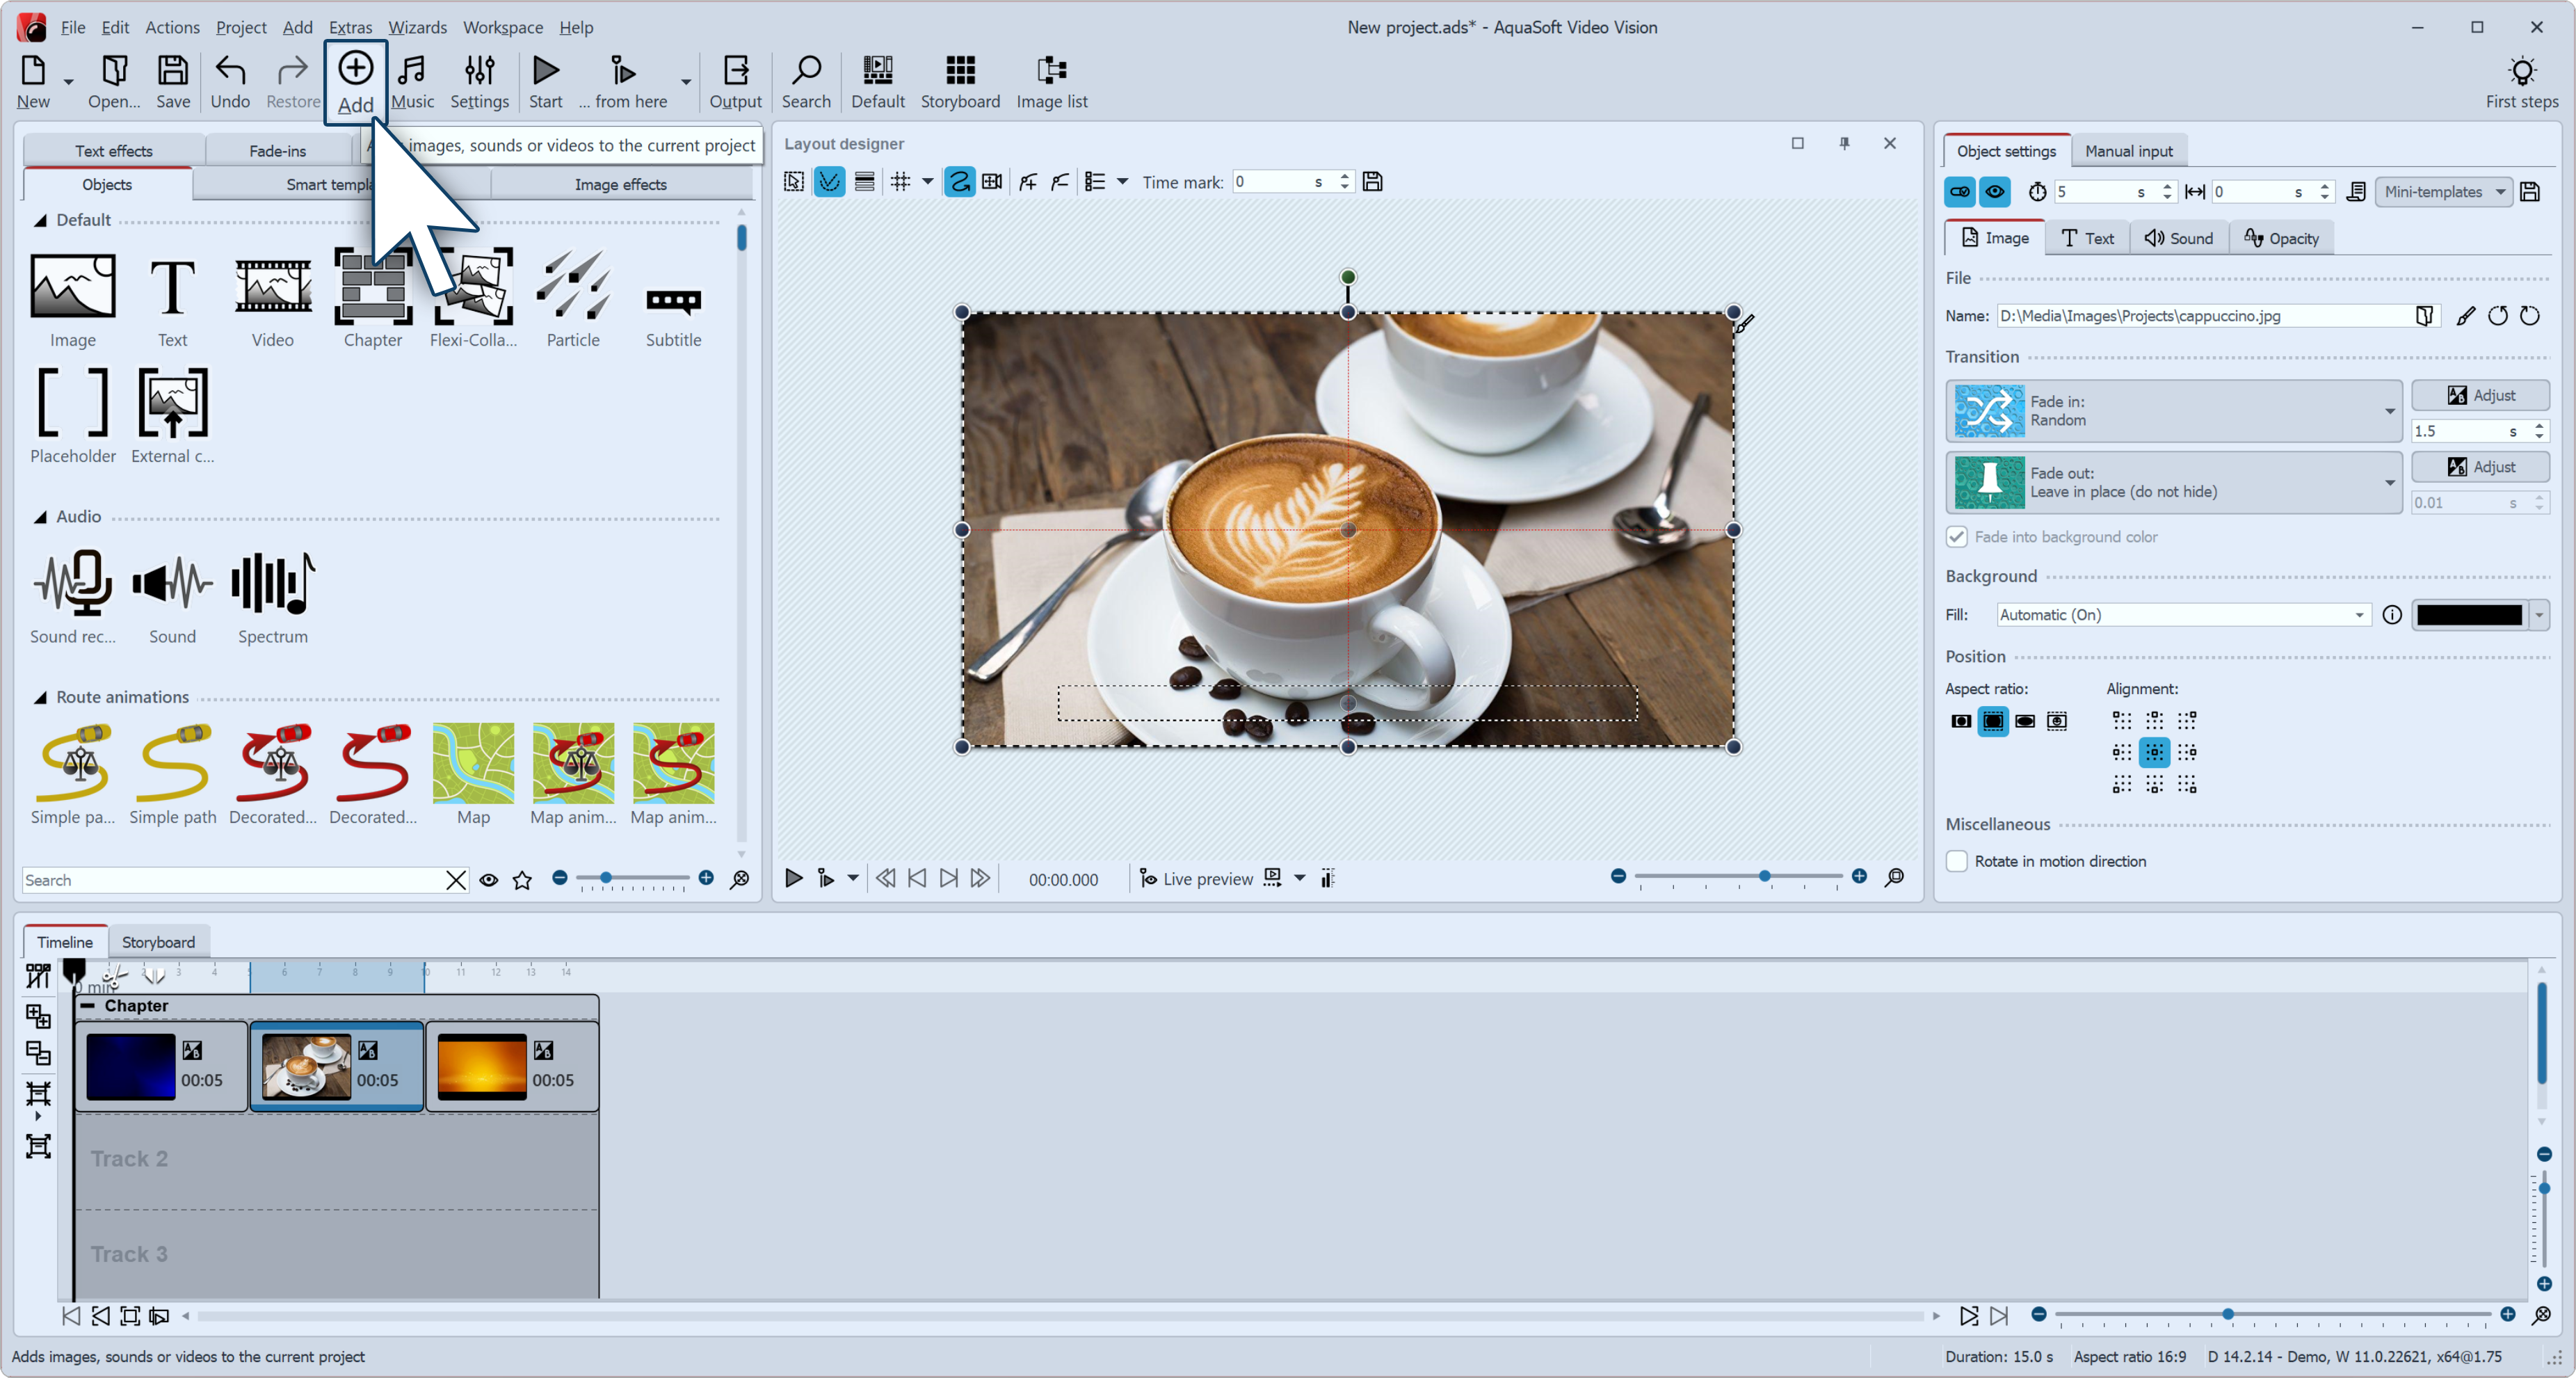
1 Insert images Click the plus icon to insert images Click on the plus symbol at the top of the Toolbar and insert your images. If you want to insert several images at once, hold down the Ctrl key and click on the images with the mouse in the file selection window. If you want to insert an entire image folder, select Add / Directory from the top menu. •In the Insert Images chapter you will learn more ways to insert images. •If you want to label your images, see the Labeling an image chapter . •To learn how to add a sound comment to images, see the Sound Wizard chapter . |
||
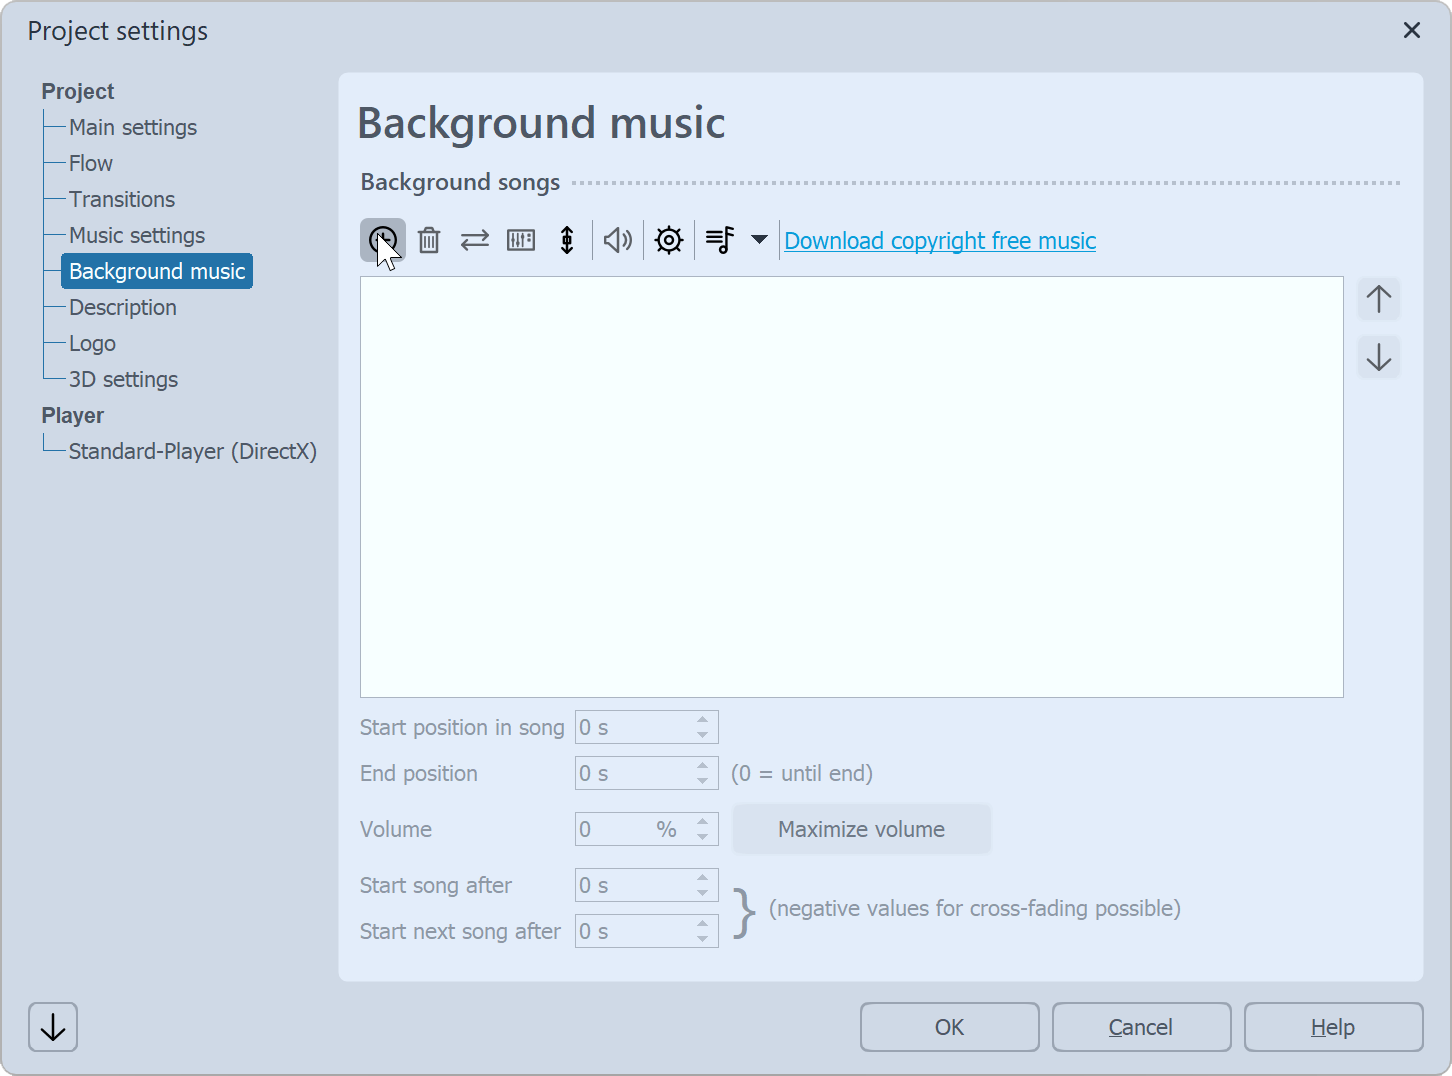
2 Insert background music Add background music Click on the music icon in the Toolbar. The background music menu opens with an empty track list. There is a plus symbol in the menu that you can use to add music titles. Confirm with OK to load the titles into the project. |
||
3 The show can beginYou have inserted images and music in two steps and can now play the presentation. To do this, click on the Play button in the menu bar or press the F9 key. The transitions, i.e. the crossfades from one image to another, are randomly selected - depending on the setting Extras / Program settings / Default image settings. In the chapter Assign transitions you will learn how to define them yourself.
|