|
<< Click to Display Table of Contents >> Displacement effect |
  
|
|
<< Click to Display Table of Contents >> Displacement effect |
  
|
|
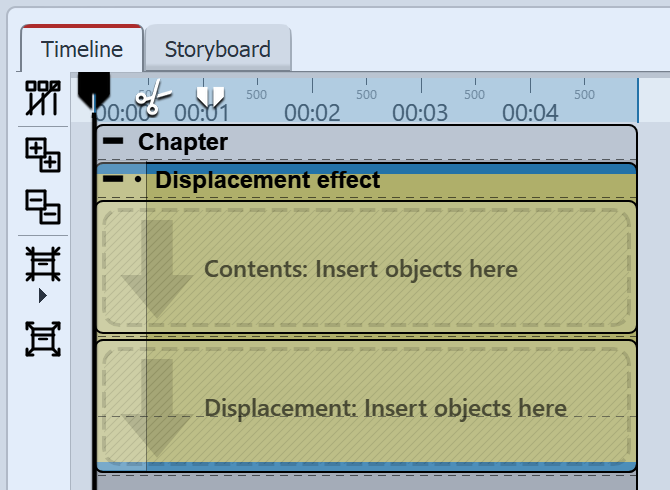 Displacement effect in the Timeline With the Displacement effect you can optically distort the surface of your photos or videos. In this way the images can bulge, bend or have their presentation influenced in other ways You will need a displacement map, i.e. a graphic that describes the optical displacement (e.g. the distortion). The colors which are contained in the Displacement Map determine the change which the Displacement effect causes: The red channel determines the shift on the x-axis in both positive and negative directions (127 corresponds to no displacement). With a neutral gray map (value 127 for each channel) there is no shift. If the map layer is empty, it is interpreted as neutral gray. |
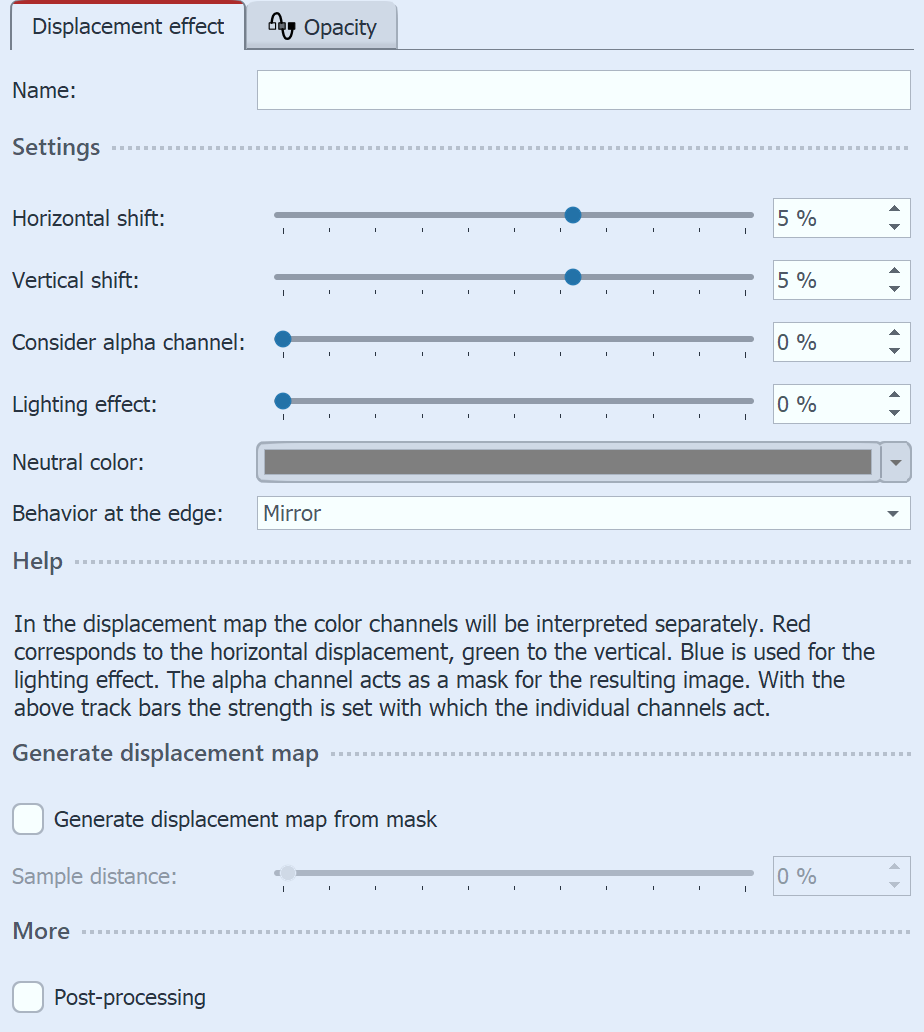 Settings for Displacement effect The channel value stored in the displacement map is multiplied by the value in the effect setting in each case. This is how the displacement is calculated. The amount of distortion is adjustable by using the controllers Horizontal shift / Vertical shift. The transparency can be modified with the alpha channel. Transparent areas of the map are used as a mask. The higher the value, the more invisible the masked areas appear. The Lighting effect is multiplied by the blue channel. Neutral color: The default color is neutral gray. The color value can be changed if necessary. Behavior at the edge defines how areas at the edges that are left "empty" due to the distortion are filled. Generate displacement map from mask: The map in the effect is optimized for the Displacement effect. This can be used to improve the spatial effect of, for example, images or graphics that do not correspond to a "classic" displacement map. The Sample distance describes the strength of the new map progression. Only in AquaSoft StagesClick on the Curve icon to choose between "Value" and "Curve". |
|
Under File / Open / Sample Project you will find a finished project in which the Displacement effect has been applied onto a Flexi-Collage with graphics and text. The example can be found under the name "Displacement". |
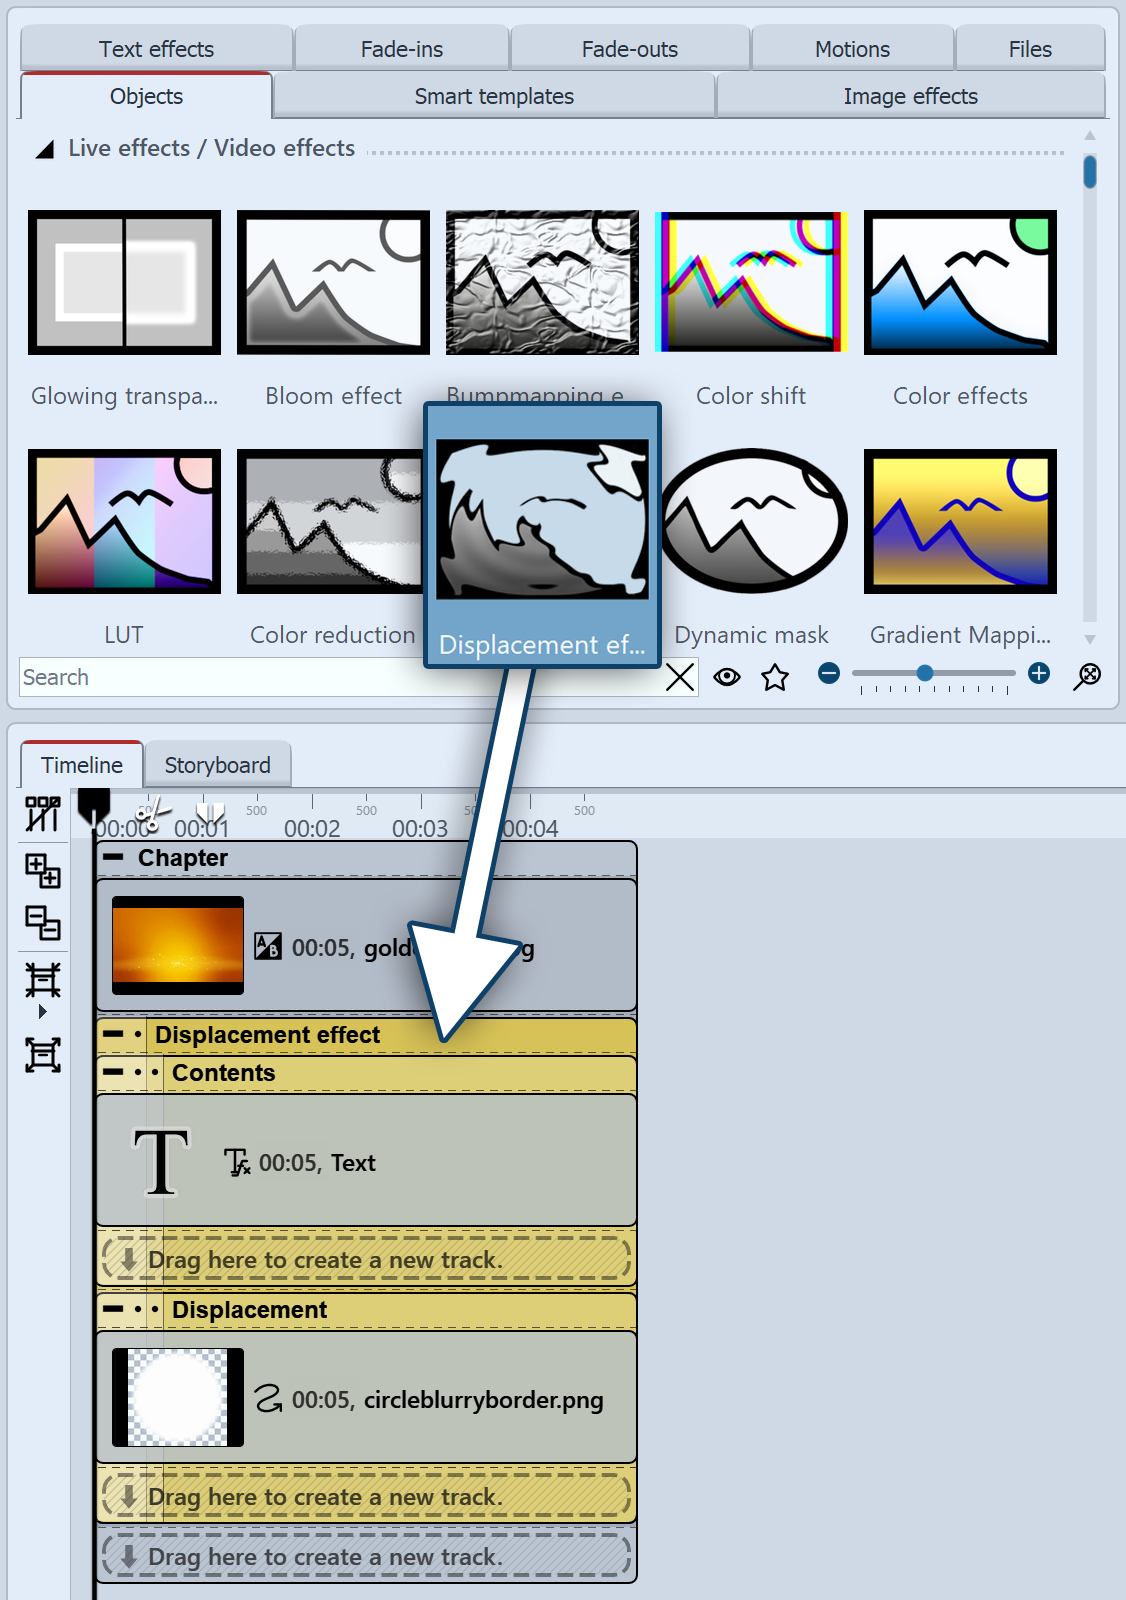 Dragging objects to the Timeline one by one 1 Drag objects into the TimelineFirst, drag a Chapter object from the Toolbox to the Timeline. In the chapter, drag an Image object, also from the Toolbox, to the Timeline. Then select any photo. Under the Image object, drag the Displacement effect located in the Live Effects section of the Toolbox. Place the objects so that they are exactly below each other.
|
2 Fill areas of the displacement effectThe Displacement effect comprises of two fields, both of which should be filled. The first field (Content) contains the image content which will later be visible, such as photos, text or videos. Drag a Text object from the Toolbox into the Content field. Enter a text under Properties and set there a value for the font size as high as possible and deactivate the text outline effect. The second area includes the displacement map described above. An Image, a Video, texts and even a Flexi-Collage or a Chapter can be inserted here. The distortion is calculated by the color values present in the displacement map. In the Displacement field, drag a graphic that describes the relief with which the text object in the Content area is to be distorted. To do this, you can drag the "Circle, soft" from the Masks area in the Toolbox. |
3 Displacement map distorts contentThe object located in the Displacement area now distorts the object located in the Content area. In the image on the right, a dynamic distortion is created by moving the circle mask from the Displacement area using a Motion path. 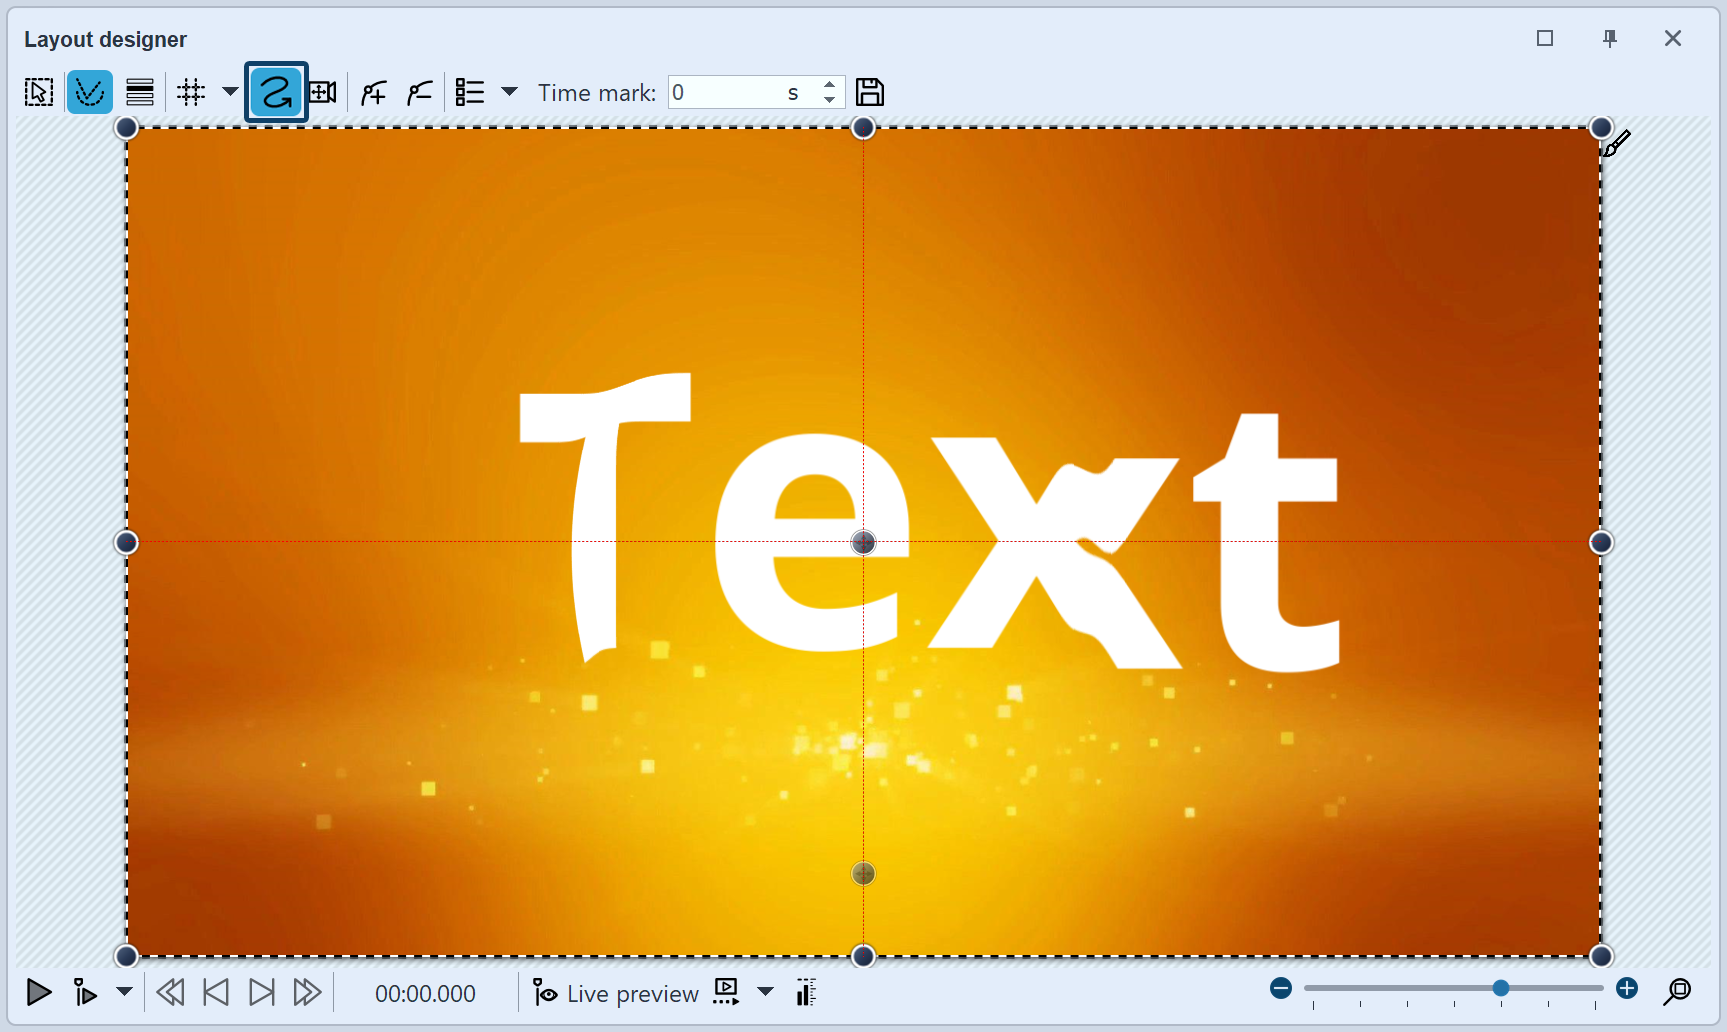 Text object is distorted by Displacement effect 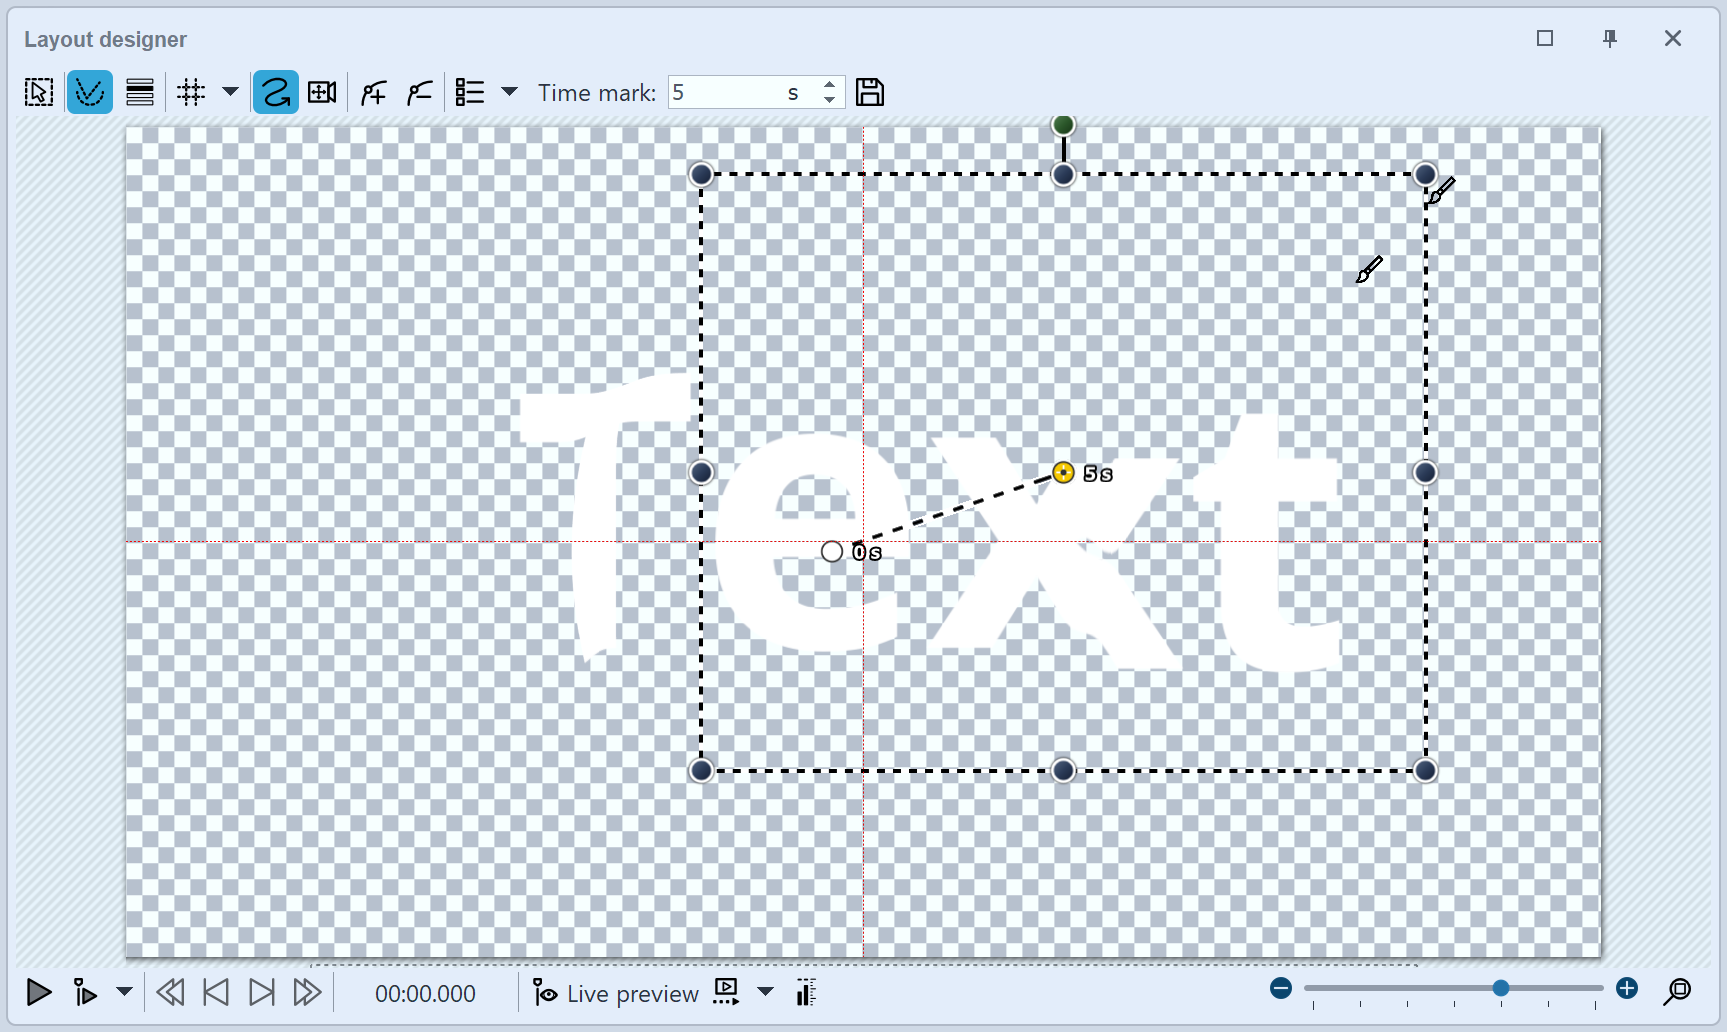 Motion path on shape creates change in displacement map |
|
The Displacement effect is presented in our video "Der Displacement-Effekt (AquaSoft DiaShow / Stages 10)". |