|
Start the program, then select an empty 4:3 slide show in the "Welcome dialog".
Before you start with your work switch to "View" -> "Layout". Here you will also find the "Timeline".
1. Adding images
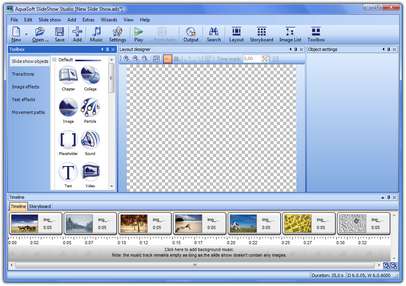
You can select end add photos via "Add" -> "Images". You also can add whole directories via "Add" -> "Directory". The selected images will be displayed in the "Timeline". By using "Edit" -> "Sort" you can get the images into a certain logical order, e.g. by their EXIF-exposure date. Naturally, you sort your images manually, as well.
|
2. Adding background music
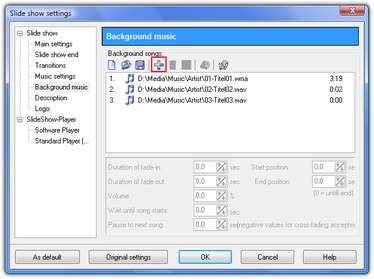
Music enriches your live and your show. Via "Add" -> "Background music" you can select music titles by clicking the "Plus"-button. The order of the titles can be changed by moving them with the mouse.
Remove titles from the list by clicking the "Trash bin"-button. If you select a title you can adjust its settings. Then click "OK". The music titles will be displayed in the "Timeline".
|
3. The show can begin
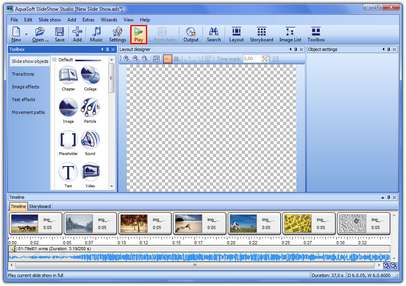
This quick you can see results. In two steps you added pictures and music, and now you can play your show. To do this click the "Play"-button in the menubar or "F9". Transitions are selected randomly and each time you play the show your images have a different transition.
That's not enough yet? You want to specify the display duration, enter text and define transitions yourself? No problem with AquaSoft ® SlideShow!
|
4. Image properties
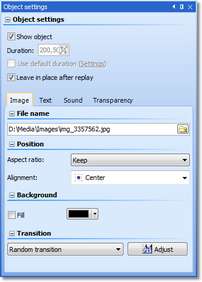
Select the first image. On the right side you will find the image properties. Here you can assign a fixed transition, text and comments to the image. You can also customize the duration of the image.

|
If you want to change the duration of several images at once select all images that are to be edited via "Ctrl"+"A" in the Image list and change the value of the duration. It will be assigned to all selected images. Under Program settings you can also change the default value for the duration. These changes then apply to all images that have "Use default duration" checked.
|
|
5. Specifying transitions
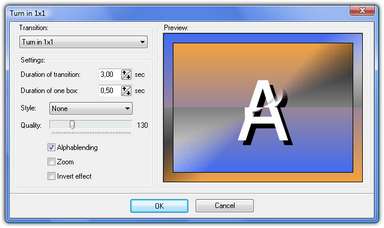
If you don't want to leave the transition to chance select the one you want from the list. If you click the "Adjust"-button you can further edit the transition properties.
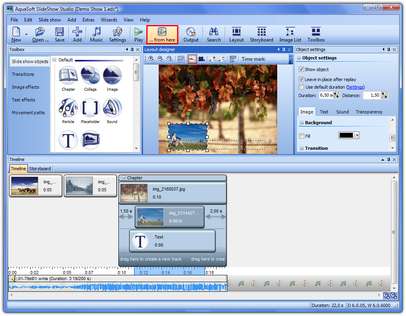
With the  -button ("... from here") in the menubar you can play the show from the position of the currently selected image. -button ("... from here") in the menubar you can play the show from the position of the currently selected image.
|
6. Text fade-in
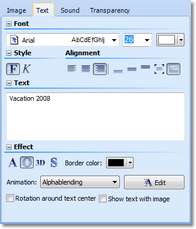
Under object settings for images you can find the tab "Text". Here you can enter text to accompany the image and also add formatting. The text can have an animation applied as well. After clicking the "Edit" -button you can customize this animation and specify whether or not to leave the text in place after playing the image. If you activate the function "Show text with image" the text will be displayed together with the image and will not be animated separately.
|
7. Commenting images
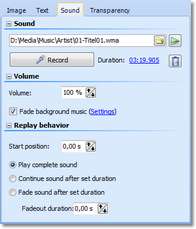
On tab "Sound" you can record a comment via a connected microphone. To do this click the "Record" -button. The duration of the image will be automatically adjusted to the comment. Alternatively you can assign a specific sound file to the image. Click on the yellow folder to select the file.
|
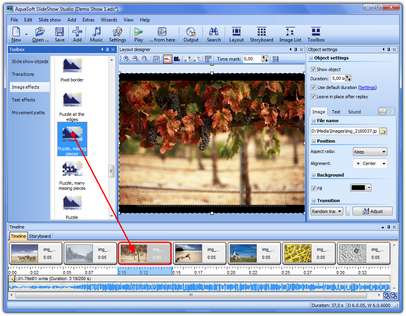
8. Ken Burns Effect
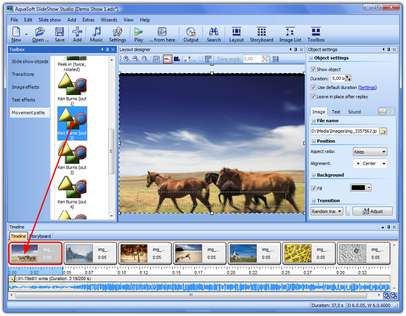
SlideShow provides predefined "Movement paths" in the "Toolbox". Among them you can find the "Ken Burns Effekt". Drag the Ken Burns Effekt from the "Toolbox" directly to an image in the "Timeline". Now play that image. There are many more options to animate images with zooms and camera pans. You can find more information about this at a later point in this manual.
|
9. Image effects
Just as easy as adding a Ken Burns Effect you can assign other special "Image effects". To do this go to "Image effects" in the "Toolbox". Drag an image effect to an image in the "Timeline". Click on this image and you will see it in "Layout designer" with the effect applied.
Image effects influence how an image is displayed. They are not transitions. Those you can find in the image properties (Box 4 on this page) and under "Transitions" in the "Toolbox".
|
10. Creating a collage
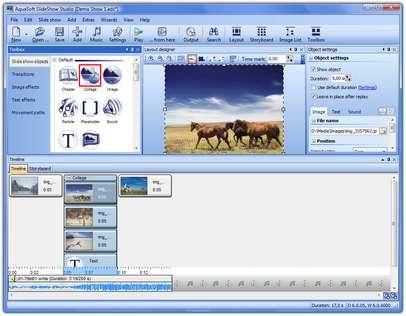
In the "Toolbox" you can find the "Collage" -object. It allows to display several images and texts at the same time. Simply drag it from the "Toolbox" to the "Image list" to insert it into the slide show. Now select those images from the Image list that you wish to include into the collage and drag them to the "Collage" -object. Expand the collage so that the images are displayed. Under object settings for collages you can select the transition you want to apply.
|
11. Editing a collage
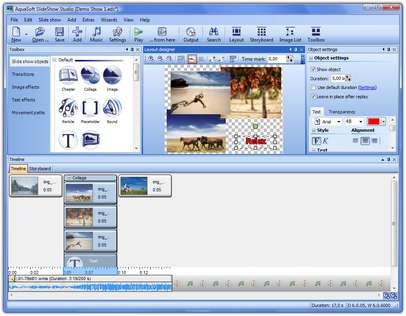
Select the first image in the collage and resize it in "Layout designer" by using the position frame at the edges of the image. Now position the image. Repeat these steps with all images in the collage. In the Toolbox you can also find the "Text" -object. Select the last image in the collage, then click the "Text" -object to insert it. The text will be added as the last object of the collage. On the "Text" -tab in Object setting you can add and format text. Now position it. Select the collage from the Image list and click the "... from here" -button to play the collage.
|
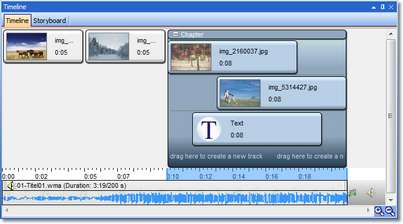
12. The powerful chapter
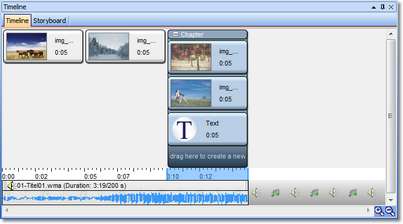
One image track is not enough for you? Then you can utilize the chapter. In contrast to the collage images and text inside a chapter don't lose their own animations and can also be temporally offset. Insert a "Chapter" -object and drag two images into the chapter. Open the chapter by clicking on the "Plus" -symbol, select the last image in the chapter and then double-click the "Text" -object in the "Toolbox" to add text after the image. To create a new track move the second image in the "Timeline" under the first. A red bar appears, which helps you with the positioning. Now move the "Text" underneath the second image and assign an animation to the "Text" -object via the "Object settings".
|
13. Temporal fine tuning
Extend the duration of the first image to 10 seconds. To do this simply drag the right edge of the preview image farther to the right. Then move the second image to the right also using the mouse. Extend the text and move it inside the "Timeline" a few seconds to the right. Select the "Chapter" and click the "... from here" -button. The text appears after the first image has been displayed for a few seconds and will be shown with an animation. In this example the text will also be shown in the second image.
|
14. Chapters can do even more
Chapters offer a variety of other options. Decrease the size of the second image inside the "Layout designer". In "Object settings" deactivate the function "Fill". Now move the image a little inside the "Timeline". Play the chapter again using "... from here". This way you can easily create many different picture-in-picture effects.
|
15. The chapter on a DVD?
The chapter also serves to divide the show into different parts. It helps to keep the overview in large shows. In addition these chapters can be utilized in a DVD-menu later. (Feature of SlideShow-Manager, which is part of SlideShow Studio 6.)
After to finished the creation of your show you can create a DVD for the DVD-player. This isn't necessary if you wish to continue to play the show on the PC.
|
16. Burning
Under "Wizards" you can find the "SlideShow-Manager". Here you can specify which menu to use to create your DVD. Select a template, then go to "Project" -> "Burn project". The "Video-DVD" is for the DVD-player. A self-starting CD/DVD for PC will be created under "PC show".
If you're using SlideShow Deluxe 6 select "Video-Wizard" to create a DVD for DVD-player. The "CD/DVD and Archive Wizard" creates a self-starting CD/DVD for PC.
The conversion of a slide show into a video can take some time. After that you can put the burned DVD in your DVD-player and start the show.
|
Now you've created a slide show with effects and background music. Your family and friends will be impressed.
Naturally, there is much more to discover, and you can now start with experimenting with the multitude of other possibilities in AquaSoft ® SlideShow. Editing images, using zoom functionality, recording comments, burning CDs/DVDs, etc.
|


